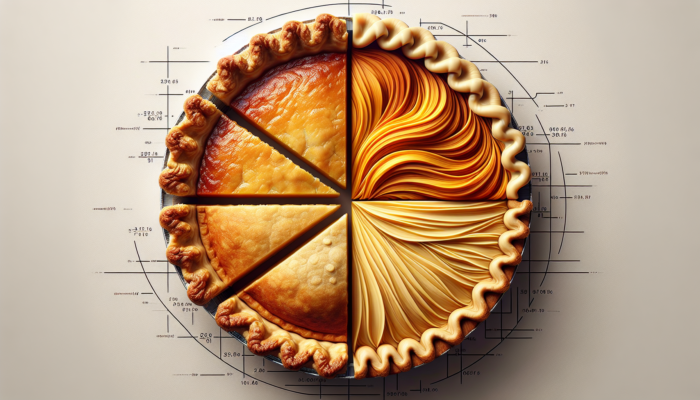
Elevate Your Baking Skills: Essential Techniques for Crafting a Perfect Flaky Pie Crust
Comparing Butter and Shortening: Discover the Best Fats for Flaky Pie Crusts
Mastering the art of creating a flaky pie crust begins with selecting the right fat, a crucial decision that influences the texture and flavor of your baked goods. Butter is often favored for its rich, creamy taste and aromatic characteristics that significantly enhance the overall flavor profile of your pie. Nevertheless, some bakers discover that butter alone may not deliver the optimal flakiness they seek. Conversely, shortening is renowned for its exceptional ability to create a tender, flaky crust due to its unique melting characteristics. For the best of both worlds, consider blending butter and shortening. This harmonious combination allows you to savor the depth of butter’s flavor while reaping the benefits of the superior flakiness that shortening provides, culminating in a crust that is both scrumptious and texturally delightful.
Combining these two fats not only enhances the flavor but also plays a significant role in maintaining the structural integrity of the crust. You have the flexibility to adjust the fat ratio to your liking, with a popular 50/50 mix often resulting in outstanding outcomes. Always prioritize using high-quality butter that boasts a higher fat content to guarantee optimal baking results. Your choice of fat can truly transform your pie-making experience.
The Remarkable Benefits of Using Lard in Your Pie Crust Creation
Despite being frequently overlooked in discussions about fats for pie crusts, lard deserves recognition for its extraordinary capability to yield an incredibly flaky texture. With nearly 100% fat content, lard produces a crust that is unmatched in lightness and flakiness. This exceptional quality arises from the unique melting point of the fat molecules present in lard, which promotes the formation of numerous layers within the crust, leading to a wonderfully flaky texture that is hard to beat.
When selecting lard, aim for high-quality leaf lard, derived from the kidney area of pigs. This choice provides a cleaner taste and superior texture compared to standard lard. If taste is a concern, rest assured that well-sourced lard won’t impart any undesirable flavors; rather, it enhances the overall experience of your pie. Many time-honored recipes continue to incorporate lard to achieve that sought-after flaky texture, making it a valuable option to explore, especially if you haven’t given it a try yet.
Crafting Delectable Vegan Pie Crusts: Exploring Plant-Based Alternatives
For those who prefer plant-based options, it is entirely feasible to create a flaky pie crust that satisfies various dietary preferences. Popular substitutes such as coconut oil and vegan butter bring their own unique attributes to the table. While coconut oil may yield a slightly different texture, it still achieves impressive levels of flakiness, particularly when kept cool during the mixing stage.
It’s crucial to recognize that utilizing these alternatives will significantly alter the flavor profile of your pie crust. Coconut oil imparts a subtle coconut essence, which might enhance or clash with the specific type of pie you are preparing. On the other hand, vegan butter can typically substitute traditional butter directly; however, the quality can vary dramatically among brands, impacting both flavor and texture.
Experimentation is essential when working with these plant-based options, as achieving the perfect balance of taste and texture may take several attempts. However, with the right techniques and an adventurous spirit, you can successfully create a delicious vegan pie crust, allowing everyone to experience the joy of baking, regardless of dietary restrictions.
Achieving Flakiness: The Importance of Keeping Ingredients Cold
Chilling Fats: The Secret to Flaky Layers in Your Pie Crust
The temperature of your fats is intrinsically linked to the texture of your pie crust. Maintaining cold fats is crucial for achieving those irresistible flaky layers that everyone loves. When cold fat is incorporated into the dough, it remains solid during the mixing process, creating distinct pockets of fat within the flour. As the pie bakes, these pockets melt, producing steam that lifts and separates the dough, resulting in a beautifully flaky texture that elevates your pie.
It’s important to extend the chilling process beyond just the fat; all ingredients should be kept cold. Always take your butter or shortening directly from the refrigerator to ensure it doesn’t melt into the flour prematurely. This practice becomes especially critical during warm weather or summer months when maintaining temperature control becomes more challenging.
For maximum flakiness, consider chilling your mixing bowl and utensils as well. These small adjustments can dramatically affect your outcomes, ensuring your crust attains the desired texture and consistency that enhances your pie-eating experience.
The Essential Role of Ice-Cold Water in Crafting Perfect Dough
An additional vital element in creating a flaky pie crust is the incorporation of ice-cold water. The temperature of the water is critical in preserving the integrity of the fats throughout the mixing phase. By adding cold water, you prevent the fat from melting too soon, allowing it to remain distinct within the dough, which is essential for achieving a flaky texture.
Utilizing ice-cold water also minimizes gluten development, which can lead to a tougher crust. While gluten is beneficial for providing structure in bread, it can result in an undesirable chewiness in pie crusts. It’s best to use the minimum amount of cold water necessary to bring the dough together. If the mixture appears dry, add water by the teaspoon until you reach the desired consistency without overworking the dough.
This simple yet crucial step helps maintain the delicate balance between flakiness and tenderness, ensuring that every bite of your pie crust is as delightful as the filling it encases.
Refrigerating Your Dough: A Crucial Step for Pie Crust Success
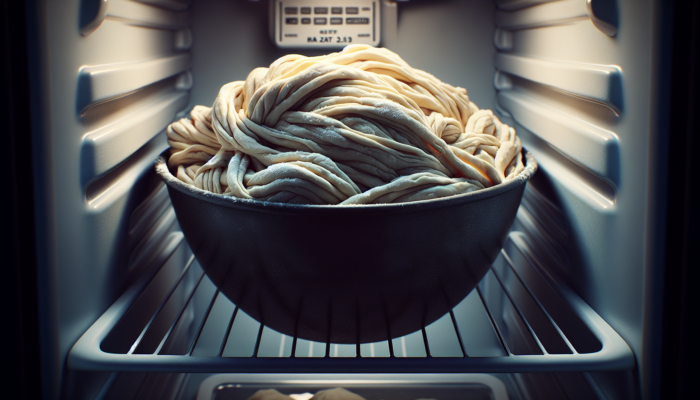
After mixing your dough, the next indispensable step is to refrigerate it. Allowing your dough to rest in the fridge is critical, as it relaxes the gluten strands formed during mixing. This relaxation not only facilitates easier rolling but also enhances the overall texture of your crust, leading to a more enjoyable pie experience.
Aim to chill the dough for a minimum of 30 minutes, although longer periods can yield even better results. This resting time allows the flour to fully hydrate and combine with the fats, resulting in a dough that rolls out more easily, is less prone to shrinkage during baking, and offers improved flakiness.
If you don’t plan on using the dough immediately, you can also freeze it. Wrap it tightly in plastic wrap or a freezer bag to guard against freezer burn. When you’re ready to bake, simply transfer it to the refrigerator to thaw overnight.
Chilling and relaxing your dough can profoundly influence the final product, transforming a good pie crust into an exceptional one that delights the palate.
Mastering Mixing Techniques: Key Strategies for a Flaky Pie Crust
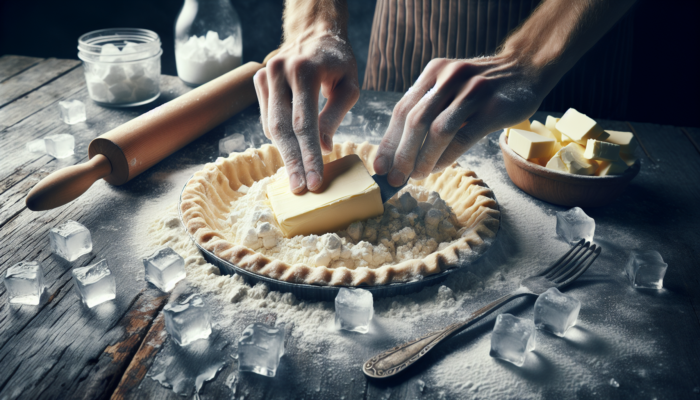
Perfecting the Art of Cutting in Fat for Maximum Flakiness
The process of incorporating fat into your pie crust is fundamental for achieving that sought-after flakiness. The technique of cutting in the fat, whether it’s butter, shortening, or lard, requires careful attention to detail. Your objective is to create small, pea-sized pieces of fat throughout the flour. This can be accomplished using a pastry cutter, fork, or even your fingers.
When cutting in the fat, take your time and work gently. The goal is to preserve those small bits of fat rather than melting them into the flour. Each piece of fat acts as a barrier to gluten formation, creating pockets that will expand during baking, resulting in a wonderfully flaky texture that is the hallmark of a great pie crust.
If you find this step challenging, consider chilling your utensils to maintain the temperature of the fat. This ensures that each piece remains intact, contributing to the overall flakiness of your crust. Remember that the art of pie-making lies in the details, and mastering the technique of cutting in your fat is one of the secrets to achieving a flaky pie crust that impresses.
Minimizing Dough Handling: The Pathway to Tender Results
Overworking your dough is a common misstep that can lead to a tough, undesirable crust. After incorporating the fat, it’s essential to handle the dough as little as possible. Excessive mixing promotes gluten development, which can rob your pie crust of its tender, flaky quality.
When combining the ingredients, mix them just until they come together. The dough should still appear slightly shaggy; don’t be alarmed by this. The addition of cold water should be just enough to amalgamate the ingredients without extensive handling. This minimalist approach ensures that your dough remains tender and flaky, allowing it to rise beautifully during baking.
If you encounter difficulties working with the dough, resist the urge to knead it. Instead, allow it to rest in the fridge. This resting period lets the flour fully hydrate and the gluten to relax, making it easier to roll out without compromising texture.
Enhancing Your Pie Crust with the Folding Technique
The folding method is an exceptional technique for those eager to refine their pie-crust skills. Similar to making puff pastry, this approach involves rolling out the dough and folding it over itself multiple times. This process creates layers within the crust that significantly contribute to its flakiness.
Begin by rolling out your dough into a rectangular shape. Next, fold it into thirds, like a letter, before rolling it out again. Repeat this process several times, ensuring the dough remains chilled throughout. Each fold introduces additional layers of fat and flour, which will separate during baking, leading to a beautifully flaky texture that enhances the overall quality of your pie.
This technique is particularly beneficial for those who wish to create a more sophisticated pie crust. It elevates both the flavor and texture, resulting in a crust that is not only visually striking but also delectably flaky and tender, making your pie a true standout at any gathering.
The Critical Importance of Keeping All Ingredients Cold
For optimal results, it’s imperative to keep every component of your pie crust cold, including the fats and any liquids you plan to use. Maintaining chilliness among all ingredients helps preserve the integrity of the fats and prevents them from melting prematurely during mixing.
When preparing your ingredients, consider briefly freezing your butter or shortening. Likewise, using ice-cold water or chilling your mixing bowl can greatly enhance the process. The colder your ingredients, the better the flakiness of your final crust, ensuring that your pie is a delightful culinary achievement.
The Necessity of Resting Dough: A Key Factor for Perfect Pie Crusts
Resting the dough is a vital step that novice bakers often overlook. After mixing your dough, place it in the fridge to rest. This process allows the gluten to relax and the moisture to distribute evenly throughout the dough, making it easier to roll out while improving the final texture.
Aim for a resting time of at least 30 minutes, although extending this period can lead to even better results. When you’re ready to use the dough, take it out and let it sit for a few minutes at room temperature before rolling it out. This slight warming makes the dough more pliable, facilitating easier handling.
Resting not only enhances the dough's manageability but also improves its flavor. As the dough sits, the flour continues to hydrate, contributing to a more cohesive structure. When baked, this results in a flaky and tender crust that perfectly complements any filling you choose.
Understanding Flour Types: The Foundation of Your Pie Crust
Utilizing All-Purpose Flour for Versatile Pie Baking
Many bakers rely on all-purpose flour as their go-to choice due to its adaptability across a range of recipes. While it can be adequate for pie crusts, it may not provide the tender, flaky results that some bakers aspire to achieve. With a moderate protein content, all-purpose flour can develop gluten, which is advantageous for bread but may lead to a denser pie crust.
If you decide to use all-purpose flour, consider modifying your technique to enhance the results. The key lies in handling the dough minimally and incorporating fat correctly. This approach can still yield a decent crust, though it may not attain the same lightness and flakiness as those made with specialized flours.
To improve the texture, some bakers prefer to blend a small portion of cake flour with all-purpose flour, which can help create a more tender crust while remaining accessible for most home bakers.
Selecting Pastry Flour for Superior Flakiness in Your Pie Crust
For those serious about achieving an exceptionally flaky pie crust, pastry flour is an excellent choice. This flour produces less gluten and has a lower protein content than all-purpose flour, resulting in a more tender and flaky crust. Specifically designed for pastries, pastry flour is favored by professional bakers for its superb results.
When working with pastry flour, you may require slightly less liquid compared to all-purpose flour. This is because pastry flour absorbs moisture differently. A good rule of thumb is to start with the same amount of water and adjust as necessary, ensuring your dough remains manageable and easy to work with while achieving optimal flakiness.
Choosing pastry flour can significantly enhance your pie crust, leading to a lighter, more delicate texture that beautifully complements a variety of fillings, enriching your overall pie experience and delighting your guests.
Incorporating Cake Flour for Added Tenderness in Pie Crusts
Integrating cake flour into your flour selection can infuse your pie crust with a refined layer of finesse. With its fine texture and low protein content, cake flour enhances tenderness and flakiness, transforming your crust into a standout feature of your pie.
Typically, blending half all-purpose flour with half cake flour yields excellent results. This mixture strikes a perfect balance between structure and tenderness, offering the best of both worlds. The fine texture of cake flour contributes to a lighter crust that is robust enough to support fillings without buckling.
This method is particularly effective for fruit pies, where a delicate crust can elevate the dish to new heights. By incorporating cake flour, you ensure that every bite melts in your mouth while providing the necessary support for your delectable fillings.
Avoiding Bread Flour for Your Pie Crusts: Reasons and Alternatives
While <a href="https://limitsofstrategy.com/essential-tools-for-baking-perfect-bread/">bread flour</a> is generally associated with yeasted goods, its higher protein content can lead to a chewier texture when used in pie crusts. This is undesirable, as the goal is to create a flaky and tender crust. Using bread flour can result in a tougher pie crust that detracts from the overall eating experience.
If bread flour is your only option, consider mixing it in smaller proportions with all-purpose flour to mitigate the effects of gluten development. However, for the best outcomes, it’s advisable to stick with flours that are better suited for pie-making, such as all-purpose, pastry, or cake flour.
Choosing the right type of flour is crucial in pie-making. While experimentation can be a fun part of the process, understanding the unique properties of each flour type will help you achieve the perfect flaky pie crust that impresses.
Whole Wheat Flour: Adding a Nutty Twist to Your Pie Crust
whole wheat flour introduces a distinct nutty flavor and numerous nutritional benefits to your pie crust. However, it’s important to recognize that it can also result in a denser texture, which may not suit every pie. The bran and germ in whole wheat flour can inhibit gluten development, potentially leading to a crust that doesn’t rise as beautifully as desired.
If you wish to incorporate whole wheat flour into your pie crust, consider blending it with all-purpose or pastry flour. A 50% mix of whole wheat flour and 50% all-purpose flour can strike a balance, enhancing flavor without sacrificing flakiness.
This approach works particularly well for rustic pies, where the hearty flavor of whole wheat flour complements robust fillings. Embracing whole wheat flour can enhance the taste of your pie while contributing to a more nutritious option, appealing to health-conscious bakers who want to indulge without compromise.
Essential Techniques for Rolling and Shaping Your Flaky Pie Crust
Achieving Uniform Thickness for Consistent Baking Results
Ensuring a consistent thickness while rolling out your pie crust is vital for achieving even baking. An unevenly rolled crust can create hot spots, leading to overcooked or undercooked sections during the baking process. To ensure uniformity, start from the center and work your way outward, rotating the dough as you progress to maintain an even circle.
Utilizing a rolling pin with guides can help you maintain an even thickness, typically around 1/8 inch thick. This consistency allows the crust to bake uniformly while providing sufficient structure to support the filling. If you notice any thinner areas, you can gently patch them with excess dough, ensuring a uniform surface throughout.
The surface on which you roll is equally important. A lightly floured surface can aid in preventing sticking, but be cautious not to overload the dough with flour, which may lead to a drier crust. Keeping the dough chilled while rolling also contributes to achieving the perfect thickness while preserving its integrity, resulting in a beautifully baked pie.
Avoiding Over-Rolling to Preserve Flakiness
While it may be tempting to roll out your dough multiple times to achieve perfection, over-rolling can lead to tough crusts. Each time you roll out the dough, you risk developing gluten, which compromises the desired flakiness. Limit re-rolling to an absolute minimum and work with the dough efficiently to reduce handling and maintain its integrity.
As a general guideline, once you've rolled it out and placed it in your pie dish, avoid rolling it again unless absolutely necessary. If you find the dough challenging to manage, consider taking a break and refrigerating it for a few minutes before attempting again.
A gentle hand and careful touch are your best allies when rolling out pie dough. Treat it with respect, and it will reward you with a flaky, tender crust that’s simply irresistible.
Perfecting the Crimping Technique for an Impressive Finish
Crimping the edges of your pie crust serves both a decorative purpose and a practical necessity. Properly crimped edges seal in the filling and prevent juices from leaking during baking. This ensures your pie maintains its integrity and presents beautifully when served, making it a visual delight for any occasion.
To crimp effectively, you can use your fingers or a fork. Pinch the edges together using your fingers to create an attractive wave-like pattern or use a fork to press down along the edges for a classic look. Whichever method you choose, ensure the crust is well-sealed to prevent steam from escaping, as this can lead to a dry filling.
A well-crimped pie not only looks impressive but also ensures that every slice retains its moisture and flavor, enhancing the overall pie-eating experience and leaving a lasting impression on your guests.
Mastering Blind Baking: Essential Tips for a Flaky Pie Crust
Implementing Pie Weights for Flawless Blind Baking
Blind baking is a technique that guarantees your pie crust is perfectly cooked before adding the filling. One of the most effective means to achieve this is by using pie weights. These weights help prevent the crust from puffing up and losing its shape during the baking process, ensuring an even bake.
To blind bake effectively, line your pie crust with parchment paper and fill it with pie weights or dried beans. This added weight keeps the crust flat and stable, allowing for even cooking. After a brief baking period, remove the weights and parchment, then continue baking until the crust is lightly golden and fully cooked.
A common mistake is neglecting to use pie weights, which often results in a crust that puffs or bubbles, ruining the texture. Investing in quality pie weights or improvising with dried beans can significantly enhance the success of your blind baking endeavors, ensuring a perfectly cooked crust every time.
The Importance of Docking Your Dough for Flawless Results
Docking your dough is a straightforward yet effective technique that involves pricking the bottom of the crust with a fork before baking. This process allows steam to escape, preventing air bubbles from forming that could disrupt the crust's smooth surface.
Docking is particularly crucial for custard or cream pies, where a smooth surface is essential for both aesthetics and texture. Be sure to dock evenly across the surface to ensure consistent cooking. While this step may seem minor, it plays a vital role in achieving a beautifully baked pie crust that impresses.
Neglecting this step can lead to a crust that develops unsightly bubbles, detracting from the overall presentation of your pie. Take the time to dock your dough; it will pay off in the final product, guaranteeing a beautifully finished pie.
Determining When to Partially or Fully Bake Your Crust
Understanding when to fully or partially bake your crust is vital for pie success. A partial bake is often sufficient for fruit pies or those with wet fillings, allowing the crust to establish a base without becoming overly brown before the filling is added.
Conversely, recipes requiring wet fillings, such as custard pies, necessitate a fully baked crust to ensure the filling cooks properly. A fully baked crust should appear golden and crisp, providing a reliable base for the filling without becoming soggy or losing its delightful texture.
Knowing the difference between partial and complete baking can dramatically impact the quality of your pie. Always adhere to specific recipe instructions to determine the best approach for your pie crust, ensuring optimal results each time you bake.
Perfecting Your Flaky Pie Crust: Understanding Baking Temperature and Timing
Starting at High Heat for Optimal Flakiness and Texture
Baking at a high temperature initially is a tried-and-true strategy for achieving a crisp, flaky crust. By starting your pie at around 220°C (425°F), you help set the structure of the crust before reducing the temperature. This initial burst of heat causes the water in the fat to turn to steam, creating those beautiful layers that are essential for flakiness.
Once the crust has set, you can lower the temperature to around 180°C (350°F) to complete the baking process. This two-step approach allows for a perfectly cooked crust that balances browning and tenderness, resulting in an impressive pie that is sure to please.
Keep a vigilant eye on your pie during the baking process. While the delightful aroma of baking pastries can be distracting, don’t let it divert your attention from closely monitoring the color and texture of your crust to ensure it reaches the perfect level of doneness.
Assessing Your Pie Crust for Perfect Doneness
Knowing how to evaluate the doneness of your pie crust is crucial for achieving the perfect bake. The crust should be a lovely golden brown, indicating that it has cooked through adequately. A crust that appears too pale may suggest undercooking, while a dark, almost burnt appearance indicates overbaking.
Texture is equally important; a flaky crust should feel crisp without any signs of sogginess. If you notice damp spots, additional baking time may be necessary. Consider using an instant-read thermometer to check the internal temperature; it should read around 93°C (200°F) for a fully baked crust that is both delicious and satisfying.
Regularly assess your pie during the baking process to ensure it reaches the sweet spot of doneness, elevating your pie-baking skills to new heights and impressing your guests with your culinary expertise.
Cooling Your Pie for Maximum Flakiness and Flavor
Once your pie has emerged from the oven, it’s essential to allow it to cool properly. Doing so enables the filling to set and the flavors to meld, contributing to the crust's flakiness. If you slice into a still-hot pie, you risk it collapsing, leading to an unappealing presentation that can disappoint.
Place your pie on a wire rack to cool for at least 1 hour before serving. This airflow helps the crust maintain its crispness, preventing it from becoming soggy. Cooling also gives the filling time to thicken, ensuring each slice holds its shape beautifully, enhancing the overall eating experience.
Patience is indeed a virtue when it comes to cooling pies; allowing them to rest before serving not only enhances appearance but also improves flavor, making a significant difference for your guests and elevating your baking game.
Frequently Asked Questions About Mastering Pie Crusts
What is the best fat for achieving a flaky pie crust?
The ideal fats for creating a flaky pie crust are typically butter and shortening. While butter enhances flavor, shortening contributes significantly to flakiness. Some bakers also prefer lard for its exceptional flakiness.
How can I prevent my pie crust from becoming soggy?
To avoid a soggy pie crust, it's essential to blind bake it before adding the filling. Utilizing pie weights and ensuring that your crust is fully baked will also help maintain its texture and prevent sogginess.
Is it possible to use whole wheat flour for a pie crust?
Yes, whole wheat flour can be employed for a pie crust, but it may create a denser texture. Mixing it with all-purpose flour is advisable for better flavor and flakiness.
How long should I chill my pie dough for optimal results?
Chill your pie dough for at least 30 minutes; longer chilling times can further enhance texture and handling, yielding superior final results that impress your guests.
What purpose does docking the dough serve?
Docking the dough involves pricking it with a fork to allow steam to escape during baking. This process prevents air bubbles and ensures an even bake, enhancing the overall appearance of your pie.
Should I use ice-cold water in my pie crust preparation?
Absolutely! Incorporating ice-cold water helps maintain the temperature of the fats, preventing them from melting too soon and contributing to a flaky texture that is vital for successful pie crusts.
Can I freeze my pie crust dough for later use?
Definitely! You can freeze pie crust dough for up to three months. To prevent freezer burn, wrap it tightly in plastic wrap and place it in a freezer bag before storing.
How do I know when my pie crust is perfectly baked?
A perfectly baked pie crust should exhibit a golden brown color and a crisp texture. For optimal doneness, use an instant-read thermometer to check that the internal temperature is around 93°C (200°F).
What is the folding method for crafting pie crusts?
The folding method involves rolling out the dough and folding it over multiple times to create layers, enhancing flakiness in a manner similar to puff pastry preparation techniques.
What type of flour is best suited for pie crusts?
Pastry flour is ideal for pie crusts due to its low protein content, resulting in a more tender and flaky crust. Mixing in cake flour can also enhance tenderness, providing a delightful texture that complements any filling.
Join Our Facebook Community for More Baking Tips and Tricks!
The post Secrets to a Flaky Pie Crust: Master Tips appeared first on https://cookinggods.com
The Article Flaky Pie Crust Secrets: Essential Tips for Perfection Was Found On https://limitsofstrategy.com


Your exploration of fats in pie crusts resonates with a broader trend in baking where flavor and texture are paramount. I’ve also found that the choice between butter and shortening can be particularly telling of a baker’s style. For instance, while butter shines in traditional recipes, experimenting with different ratios can lead to unexpected yet delightful results.
I completely agree with you on the role of fats in pie crusts and how they reflect a baker’s personal touch. There’s something so gratifying about the interplay between flavor and texture, and it’s fascinating how that choice between butter and shortening can define a pie’s character.
Speaking of care and personal style, I recently came across some insightful tips on maintaining the ears of our beloved Scottish Fold cats that echo the same attention to detail found in baking.
‘Ear Maintenance Tips for Your Scottish Fold Cat’
https://mannland5.com/ear-maintenance-tips-for-your-scottish-fold-cat/.